
- DIY hardscaping projects, like patios and pathways, can enhance both the beauty and functionality of your backyard while saving on labor costs.
- Proper planning, including layout sketches, measurements, and material selection, is essential for a successful project.
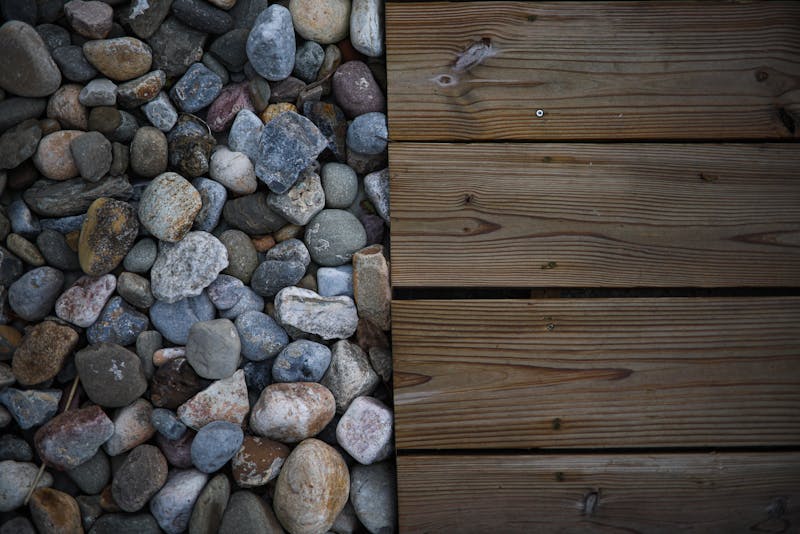
- Choosing the right materials—such as stone, brick, gravel, or concrete—impacts durability, maintenance, and overall design aesthetics.
- Step-by-step installation, from clearing the site to laying materials and filling gaps, ensures professional-looking results.
- Creative pathways with curves, stepping stones, and lighting can connect outdoor spaces and add visual interest.
- Regular maintenance, including cleaning, resealing, and checking for shifting materials, prolongs the life and appearance of hardscaping projects.
- DIY hardscaping allows homeowners to personalize their outdoor space, creating a functional and stylish backyard retreat.
Creating a beautiful outdoor space doesn’t have to break the bank. With a bit of planning, creativity, and effort, homeowners can transform their yards into stunning retreats. DIY hardscaping projects, such as patios and pathways, not only enhance the aesthetic appeal of your home but also improve functionality. Whether you’re looking for a cozy backyard patio for entertaining or charming garden paths that guide visitors through your landscape, simple hardscaping techniques can make a big difference.
In this article, we’ll explore practical steps and creative ideas to help you start your own DIY hardscaping projects.
Why Choose DIY Hardscaping Projects?
Taking on DIY hardscaping projects can feel overwhelming, but the benefits are worth it. A hands-on approach allows homeowners to customize designs, choose materials that fit their style, and save on labor costs. Additionally, working on these projects can be a fun, rewarding experience that adds a personal touch to your property.
DIY projects also give you the flexibility to start small and gradually expand. Instead of hiring expensive contractors, you can tackle sections of your yard at a time, learning as you go. With proper planning, even first-time DIYers can achieve professional-looking results without the steep price tag.
Benefits of DIY Hardscaping:
- Cost savings compared to professional installation
- Personalized design tailored to your home and lifestyle
- Flexibility to work at your own pace
- Satisfaction of creating something yourself
Planning Your Patio and Pathways
Before breaking ground, careful planning is essential. Start by considering the purpose of your patio and pathways. Will the patio be a space for dining and entertaining, or a quiet retreat? Are the pathways purely functional, or do you want them to add aesthetic appeal to your garden?
Sketch your layout on paper or use online design tools. This helps you visualize the final result and identify any potential challenges. Take measurements and note the locations of existing trees, fences, or slopes. Knowing these details will ensure your hardscaping design fits seamlessly into your yard.
Planning Tips:
- Measure your outdoor space accurately
- Consider sunlight, drainage, and traffic flow
- Decide on materials: stone, brick, gravel, or concrete
- Factor in the budget and timeline
Choosing Materials for Your Hardscaping Design
Selecting the right materials is a key part of a successful DIY hardscaping project. Each material has unique characteristics that affect both appearance and maintenance. For patios, popular options include natural stone, pavers, or stamped concrete. Pathways can be created with gravel, flagstone, brick, or decomposed granite.
Durability, ease of installation, and maintenance requirements should guide your choice. For example, flagstone provides a rustic, elegant look but may require careful leveling. Gravel is cost-effective and easy to install, but may need regular replenishing. Choosing materials wisely ensures your project lasts for years while maintaining its beauty.
Material Considerations:
- Stone or pavers for a long-lasting patio
- Gravel or mulch for flexible pathways
- Concrete for a smooth, uniform surface
- Natural integration with existing landscaping
Step-by-Step Guide to Building a Patio
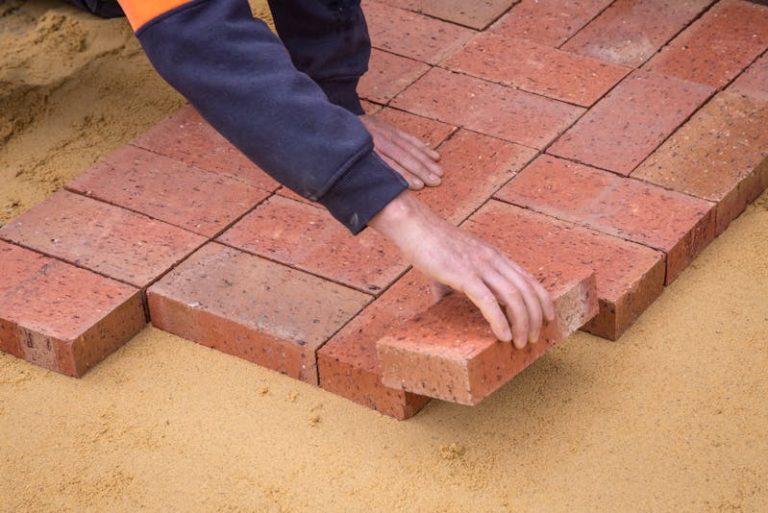
Building a patio may seem complex, but breaking it into steps makes it manageable. First, clear and level the area where your patio will be installed. Remove grass, rocks, and debris to create a smooth foundation. Next, add a layer of compacted gravel or sand to provide stability.
Lay the chosen patio material carefully, ensuring even spacing and alignment. Use a rubber mallet to adjust stones or pavers as needed. Finish by filling gaps with sand, gravel, or polymeric sand to lock everything in place. With patience and attention to detail, your DIY patio can rival professionally installed designs.
Patio Construction Steps:
- Clear and level the site
- Add a gravel or sand base
- Lay stones or pavers
- Fill gaps and compact the surface
- Optional: seal the patio for durability
Creative Pathway Ideas for Your Garden

Pathways connect different areas of your yard while adding charm to your landscape. Simple stone or brick paths can guide visitors from your patio to your garden, creating a cohesive look. Consider curves or irregular layouts for a natural, organic feel.
Adding decorative elements like stepping stones, low lighting, or edging plants can enhance the overall aesthetic. Pathways also help protect your lawn and flower beds from foot traffic, reducing soil compaction and wear. By integrating pathways thoughtfully, you improve both functionality and visual appeal.
Pathway Design Tips:
- Use contrasting colors or textures for visual interest
- Mix materials, such as gravel and stepping stones
- Incorporate garden lighting for nighttime use
- Ensure a stable, even surface for safety
Maintaining Your Hardscaping Projects
Once your patio and pathways are complete, regular maintenance will keep them looking their best. Sweep away leaves and debris, power wash surfaces periodically, and check for shifting stones or pavers. For natural stone or brick, resealing every few years can prevent cracking and staining.
Proper maintenance extends the life of your hardscaping investment while preserving the beauty of your backyard. Taking small, consistent steps will make upkeep manageable and prevent costly repairs in the future.
Conclusion
DIY hardscaping projects offer homeowners an opportunity to enhance outdoor spaces with personalized style and functionality. From patios to pathways, planning, material selection, and proper installation are key to successful results. Whether you’re creating a cozy backyard retreat or elegant garden paths, these projects can transform your home’s exterior without a large budget. By combining creativity with practical design, homeowners can enjoy beautiful, durable outdoor spaces for years to come.