
- Plan Before You Build: Assess your space, define goals, and create a layout to avoid costly mistakes.
- Choose Budget-Friendly Materials: Options like concrete pavers, gravel, reclaimed stone, and pressure-treated wood balance cost and durability.
- Prioritize Functionality: Design your backyard with zones for seating, pathways, fire pits, and other activities to maximize usability.
- Start Small and DIY Smart: Simple projects like patios, gravel paths, or rock gardens can transform your backyard without overspending.
- Integrate Hardscaping with Landscaping: Combining structural elements with plants creates a balanced, inviting outdoor space.
- Maintain Regularly: Routine upkeep like sweeping, gap refilling, and sealing wood ensures long-lasting results.
- Know When to Call a Professional: Complex structures, drainage, or electrical features may require expert help for safety and durability.
Transforming your backyard into a functional and visually appealing space doesn’t always require hiring expensive landscapers. With a little creativity, planning, and some elbow grease, homeowners can achieve stunning results on a budget through DIY hardscaping design. Hardscaping refers to the non-living elements of your outdoor space—think patios, walkways, retaining walls, fire pits, and decorative stone features. Unlike plants, which require ongoing maintenance, hardscaping provides structure, durability, and year-round visual appeal.
This guide will walk you through the essentials of designing and implementing your own hardscape projects, covering everything from planning and budgeting to materials and installation tips. Whether your goal is to create a cozy seating area, a functional walkway, or an outdoor entertainment space, these DIY strategies can help you elevate your backyard without overspending.
What is Hardscaping and Why Does It Matter?
When planning a backyard transformation, understanding hardscaping is essential. Hardscaping refers to all the structural, non-living elements that give your yard definition and utility. Common examples include:
- Patios and decks
- Pathways and driveways
- Retaining walls and garden borders
- Fire pits and water features
Unlike soft landscaping, which focuses on plants and greenery, hardscaping provides longevity and low maintenance. It creates a foundation for your yard’s aesthetic and functional layout. A well-designed hardscape not only increases your home’s value but also maximizes outdoor usability.
Hardscaping is also key to solving common backyard issues. For instance, retaining walls prevent soil erosion on slopes, while pathways reduce muddy areas and improve accessibility. By understanding its importance, homeowners can make informed choices when designing their DIY projects.
How to Start Your DIY Hardscaping Project

Planning is the first step to a successful DIY hardscaping project. Without a clear plan, it’s easy to overspend or end up with a layout that doesn’t work with your yard’s natural features.
- Assess Your Space:
Measure your backyard and note slopes, drainage issues, and sunlight exposure. Consider existing trees, structures, and utilities. - Define Your Goals:
Do you want a relaxation zone, a fire pit area, or a functional walkway? Prioritize areas that will provide the most enjoyment and value. - Create a Budget:
Determine how much you can spend on materials, tools, and accessories. Remember, DIY projects save labor costs but may still require investment in quality materials. - Sketch Your Layout:
Draw a simple map of your backyard, marking the planned hardscape features. This visual guide will help you stay organized and avoid costly mistakes.
A thoughtful start ensures your hardscaping design is both practical and visually appealing, setting the foundation for a successful DIY project.
Choosing the Right Materials for Budget-Friendly Hardscaping
Selecting materials is one of the most critical decisions for your DIY hardscaping design. The right materials balance durability, aesthetics, and cost-effectiveness.
Popular Budget-Friendly Options:
- Concrete Pavers: Affordable and versatile, perfect for patios, pathways, or borders.
- Gravel: Great for walkways or as a base under patios; inexpensive and easy to install.
- Reclaimed Stone or Brick: Eco-friendly and adds a unique rustic charm.
- Pressure-Treated Wood: Ideal for decks, raised beds, and retaining walls; requires minimal upkeep.
- Stamped Concrete: Offers a high-end look for driveways or patios without the cost of natural stone.
When choosing materials, consider maintenance requirements, longevity, and compatibility with your yard’s design. Using a combination of these materials can create visual interest without exceeding your budget.
Planning Functional Spaces in Your Backyard
A well-designed backyard combines aesthetics with functionality. Think about how you and your family will use the space throughout the year.
Tips for Functional Hardscaping Design:
- Seating Areas: Create a patio or deck area for relaxing and entertaining. Add benches or DIY outdoor furniture.
- Walkways and Paths: Connect different parts of your yard with clearly defined paths to reduce wear on grass and prevent mud.
- Zones for Activities: Dedicate spaces for gardening, play, or cooking outdoors. This organization enhances usability.
- Fire Pits and Water Features: Small features like a DIY fire pit or fountain add ambiance without dominating the space.
By thinking in terms of zones and purpose, homeowners can maximize the functionality of their backyard without overspending on unnecessary features.
Step-by-Step Guide to Installing a DIY Patio
A patio is one of the most common DIY hardscaping projects. Here’s how you can create one on a budget:
- Select the Location:
Choose a flat area with good drainage. Consider proximity to the house for convenience. - Prepare the Ground:
Remove grass, rocks, and debris. Level the ground and compact the soil. - Add a Base Layer:
Lay crushed stone or gravel for stability and drainage. Compact it with a tamper. - Lay Pavers or Stones:
Start from one corner, aligning pavers tightly. Use spacers for uniform gaps. - Fill Gaps:
Sweep sand or gravel into the gaps to lock the stones in place. - Seal and Finish:
Optional: Apply a sealant to protect against weather and stains.
A DIY patio not only enhances your backyard’s appearance but also provides a functional outdoor living space for gatherings and family activities.
Budget-Friendly DIY Hardscaping Ideas
Even on a tight budget, there are plenty of ways to transform your backyard. Here are practical, cost-effective options:
- DIY Gravel Pathways: Easy to install and low maintenance.
- Recycled Pallet Furniture: Create benches, tables, or planters from reclaimed wood.
- Fire Pit Circle: Use stones or bricks to form a simple, inviting gathering spot.
- Rock Gardens: Incorporate local stones for a natural, low-maintenance feature.
- Vertical Gardens: Combine hardscaping with soft landscaping using trellises or wall-mounted planters.
These projects require minimal tools and materials, making them perfect for homeowners looking to enhance their backyard without breaking the bank.
How to Combine Hardscaping with Landscaping
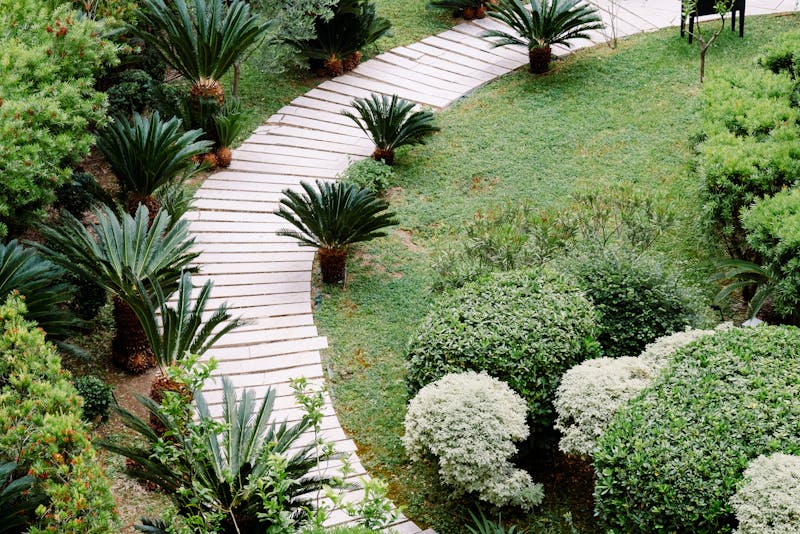
The best backyards seamlessly integrate hardscaping and landscaping. Hardscapes provide structure, while plants add color and softness.
Integration Tips:
- Place pathways or patios near flower beds or shrubs to create a balanced look.
- Use retaining walls to define garden zones and prevent erosion.
- Mix natural stone with greenery for a harmonious design.
- Incorporate planters into steps or seating areas for a layered effect.
Combining hardscaping with landscaping ensures your backyard is visually appealing, functional, and inviting year-round.
Avoiding Common DIY Hardscaping Mistakes
Even small DIY mistakes can be costly in the long run. Here’s how to avoid them:
- Skipping Planning: Without a layout or budget, projects can quickly become disorganized and expensive.
- Ignoring Drainage: Poor drainage leads to water pooling and damage to hardscape structures.
- Using Low-Quality Materials: Cheap materials may save money upfront but often require repairs sooner.
- Overcomplicating Design: Keep designs simple; complexity increases costs and installation difficulty.
By anticipating these challenges, homeowners can save time, money, and frustration while achieving professional-looking results.
Maintaining Your Hardscaping Design
Proper maintenance extends the life and beauty of your hardscape. Regular upkeep ensures durability and safety.
Maintenance Tips:
- Sweep or hose down patios and walkways to prevent debris buildup.
- Refill gaps in pavers or gravel to maintain stability.
- Inspect retaining walls and fire pits for cracks or loose stones.
- Treat wood features with sealant annually to prevent rot and decay.
- Prune nearby plants to avoid encroachment on hardscaping areas.
Routine maintenance helps preserve the investment and keeps your backyard looking fresh and organized.
When to Consider Professional Help
While DIY projects are rewarding, some aspects of hardscaping may require professional expertise:
- Complex Retaining Walls: Large walls or steep slopes may need engineered solutions.
- Drainage Systems: Poor drainage can cause erosion or structural issues.
- Electrical Features: Lighting or water pumps require proper installation for safety.
- Heavy Lifting: Large stones or concrete slabs may be dangerous to move without equipment.
Balancing DIY efforts with selective professional help ensures your backyard is safe, durable, and visually stunning.
Enhancing Your Backyard with DIY Hardscaping Accessories
Once the major structures of your DIY hardscaping design are in place, small accessories can dramatically enhance the look and functionality of your backyard. Accessories help tie the design together, adding personality and comfort without a huge investment. Consider these budget-friendly options:
- Outdoor Lighting: Solar-powered lights or string lights along pathways, patios, or around seating areas create ambiance and improve safety.
- Planters and Raised Beds: Incorporate plants and flowers in decorative containers or DIY raised beds to soften hardscaping edges.
- Outdoor Rugs and Cushions: Add comfort to seating areas with weather-resistant rugs and cushions for a cozy, inviting feel.
- Decorative Stones and Mulch: Use mulch, pebbles, or river rocks to fill gaps, define garden zones, and reduce maintenance.
By carefully selecting these finishing touches, homeowners can elevate their backyard design, creating a welcoming and stylish outdoor environment.
Conclusion: Transform Your Backyard with DIY Hardscaping
DIY hardscaping design empowers homeowners to take control of their outdoor spaces while staying within budget. By planning carefully, choosing the right materials, and implementing functional designs, even small backyards can be transformed into beautiful, usable outdoor areas.
From patios and walkways to fire pits and garden borders, the possibilities are endless. Integrating hardscaping with landscaping adds depth, interest, and a personal touch to your backyard. With creativity and careful execution, homeowners can enjoy a stylish, functional outdoor space without overspending.
Start small, plan smart, and watch your backyard become a favorite destination for relaxation, entertainment, and family time.